Who doesn’t love some abs? But no one always has time for the gym. Instead of feeling guilty with the bag of chips you just chunked in your stomach and hating yourself for not hitting the gym, I’m here to share 8 EASY ABS EXERCISES that you can do at home! Congratulations! Now you can stop giving excuses to yourself for not working out but build the body for your next beach party!
1. Plank – 60 seconds 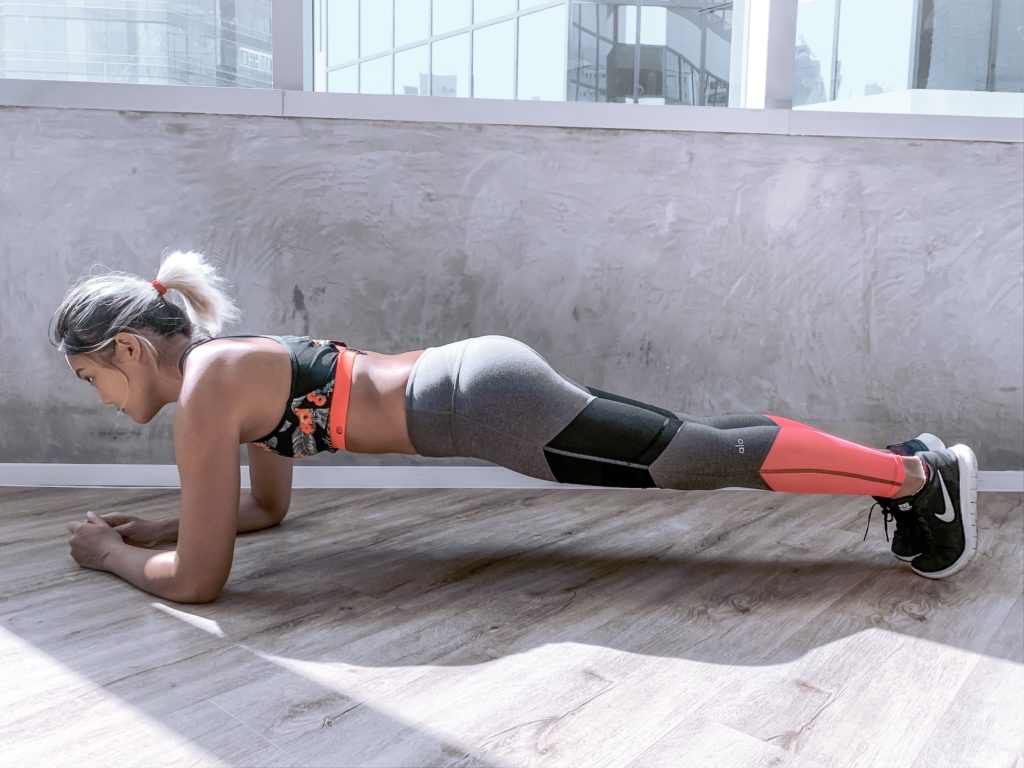
Benefits:
Plank is a great exercise to strengthening your core, warm up your body or wrap up the workout! You will be working on 90% of your body muscles including arms, core, and legs.
How to:
We start our workout with a 60 seconds plank hold, you are allowed to reset in every 30 seconds if you need to. Remember the 5 SECONDS RULE, reset within 5 seconds or your workout will not be effective as it could. The first 15 minutes of your workout help to burn fat before starting to train your muscles.
Points for Planking:
- Shoulders should be straight above your elbows. It will give shoulders too much pressure if it’s beyond your elbows.
- Tighten your core, belly button towards the spine. Keep the core attention to protect any back pain.
- Hips don’t go lower than shoulders, it brings pressure to your lower back.
- Keep squeezing your bum and thighs to support your whole body.
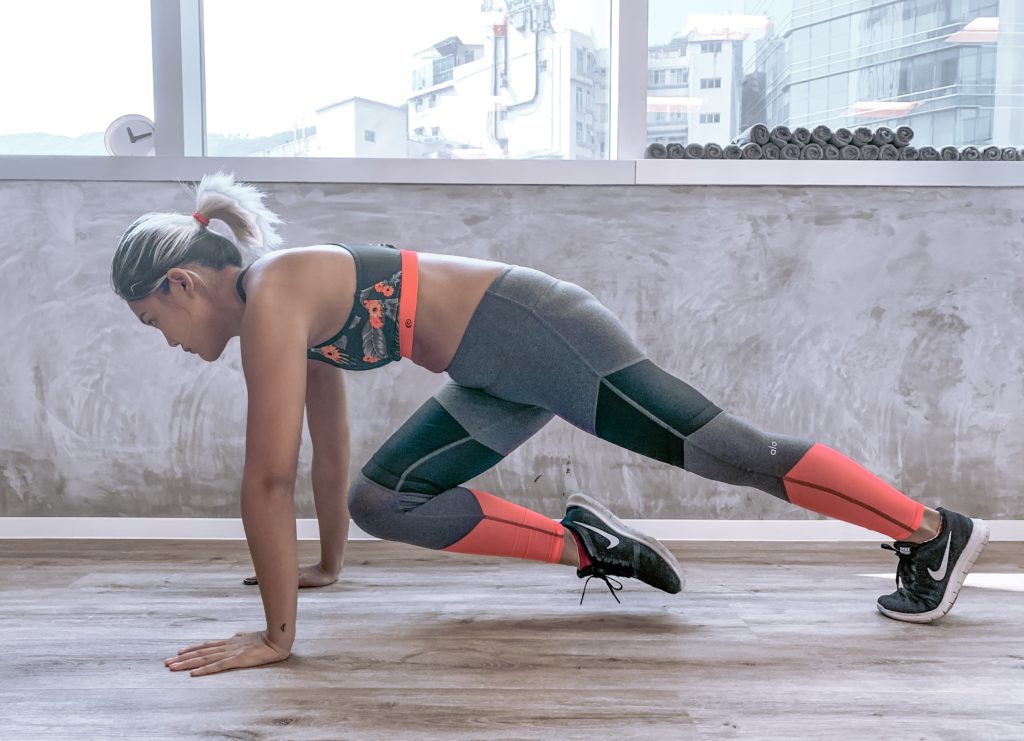
2. Mountain Climbers – 30 reps, 3 rounds (both side as 1 rep)
Benefits:
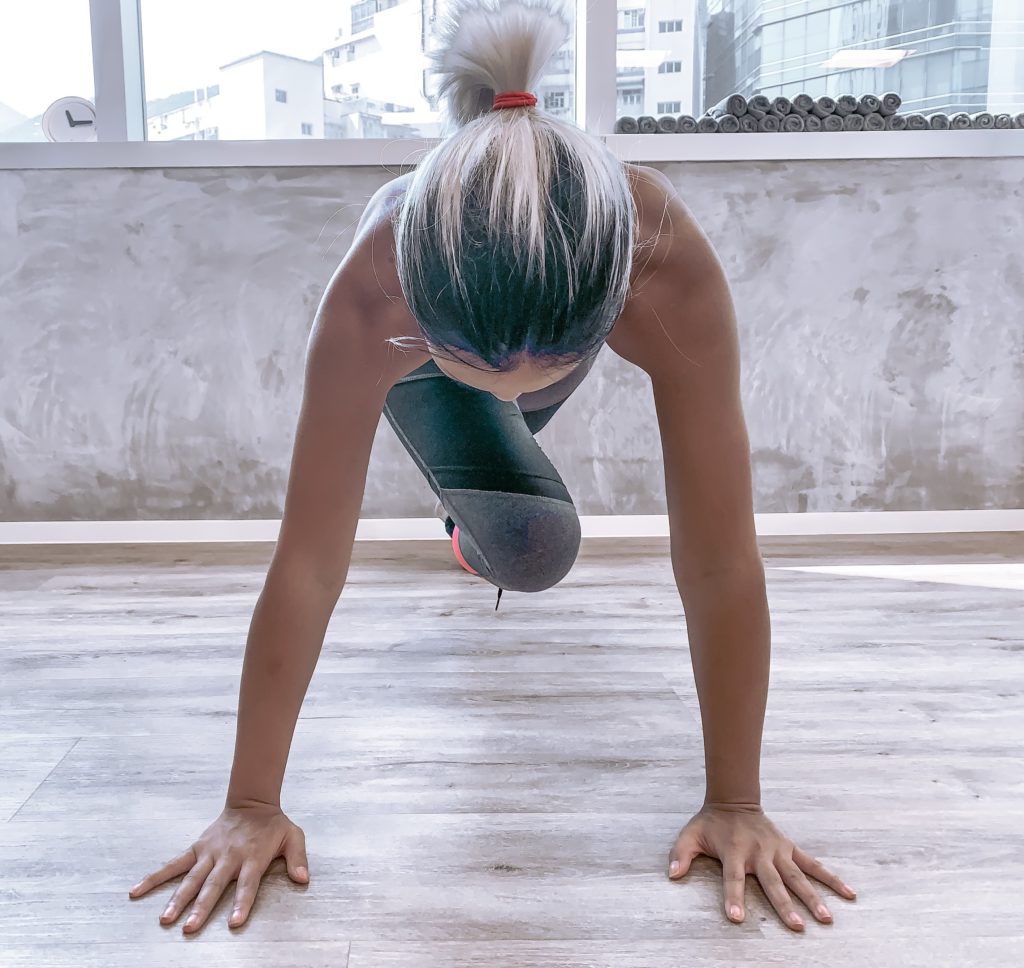
Mountain Climbers required the attentions of your arms (deltoids, triceps), core (chest, abdominals, obliques) and legs (quadriceps, hamstrings). Not only engaging the whole body but also a good cardio workout.
How to:
Press on the floor with your arms, tighten your core. Start with a plank position and get your left knee towards your right elbow, and switch to the other side. If you want to work more on your oblique, get your knee towards the opposite side elbow.
Points for Mountain Climbers:
- Avoid collapsing your shoulders or hips.
- Straight-line with your arms, shoulder above the wrist.
- Spread your fingers to balance yourself.
- Do it as fast as you can and keep breathing.
3. Russian Twist – 30 reps, 3 rounds (both side as 1 rep)
Benefits:
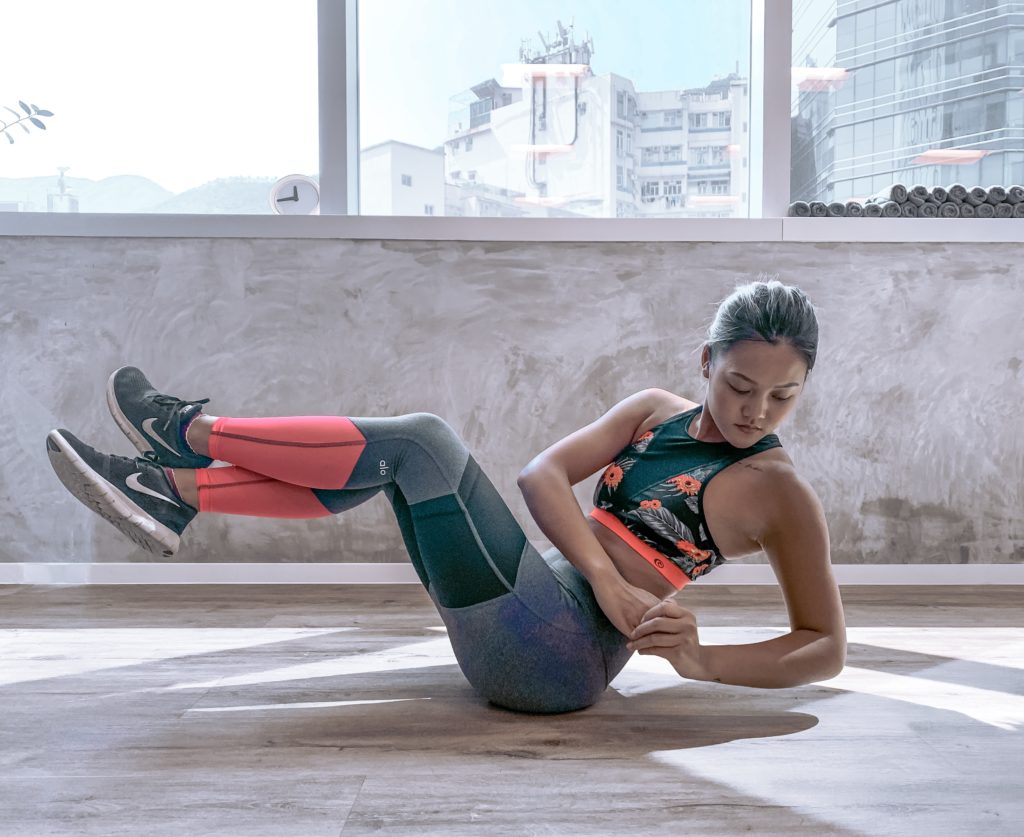
Russian Twist is one of my favorite oblique workouts, it doesn’t take long to feel your obliques burning if you doing it right. This workout is mainly focusing on obliques and it requires balancing. For beginners, you can do it with your body weight. But if you’re feeling strong on the day, grabbing some weight would be ideal. You can hold a dumbbell or a filled large size water bottle if you don’t have equipment at home.
How to:
Sit on your bum and put both your legs up (you can cross your legs if you feel more comfortable), keep your core active and avoid arching your back. Both hands connected and turn your upper body to one side, squeeze your obliques when you turn and make sure your lower body is stable. Keep switching to another side and don’t stop until the first rep is over, make your obliques BURN!
Points for Russian Twist:
- Tighten your core
- Spine is straight
4. Bicycle Crunch – 20 reps, 3 rounds (both side as 1 rep)
Benefits:
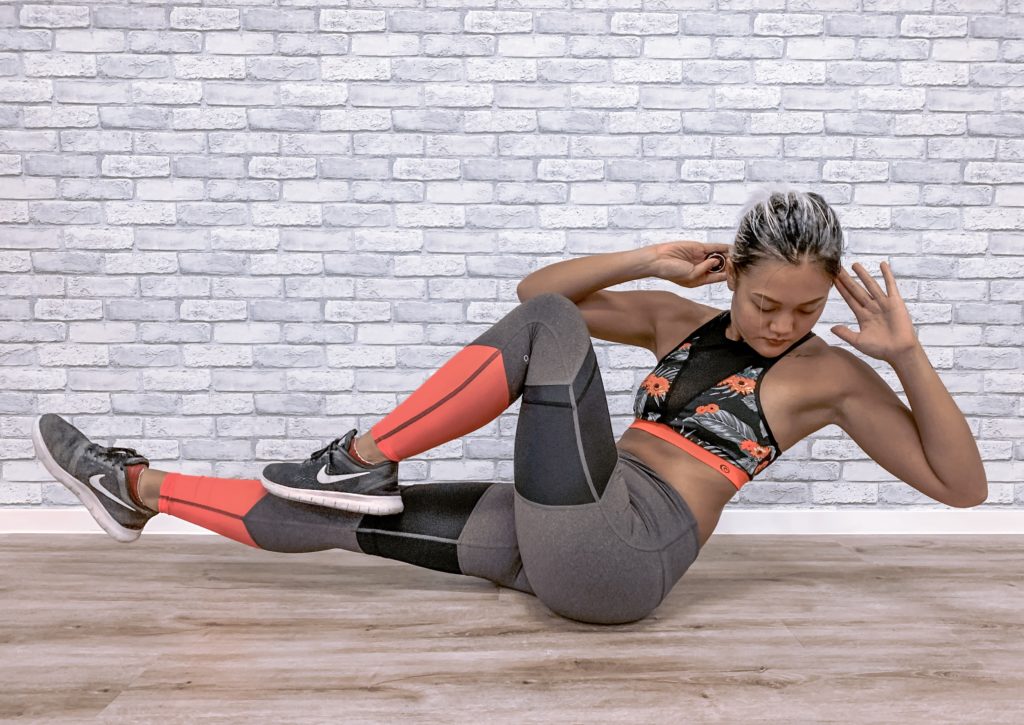
Bicycle Crunch is similar to Russian Twist, but it requires your arms and legs to engage. It’s perfect to maintain the obliques burn from the previous exercise,
How to:
Put your fingers towards the head and keep your elbows high. Twist your oblique like how you do from Russian Twist, along with your legs cycling. Make sure your elbow touches the knee when you twist and keep the other leg straight.
Points for Bicycle Crunch:
- Elbow touches the opposite knee ever time.
- Belly button towards the spine.
- Legs not touching the ground at all.
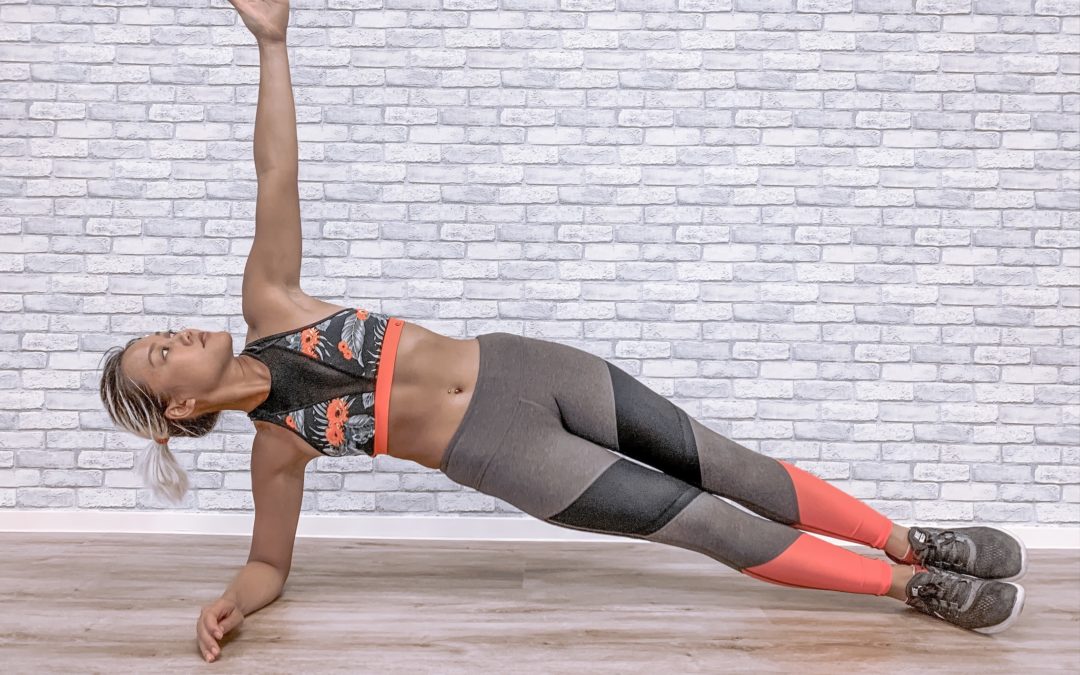
5. Thread The Needle – 15 reps, 3 rounds
Add a twist
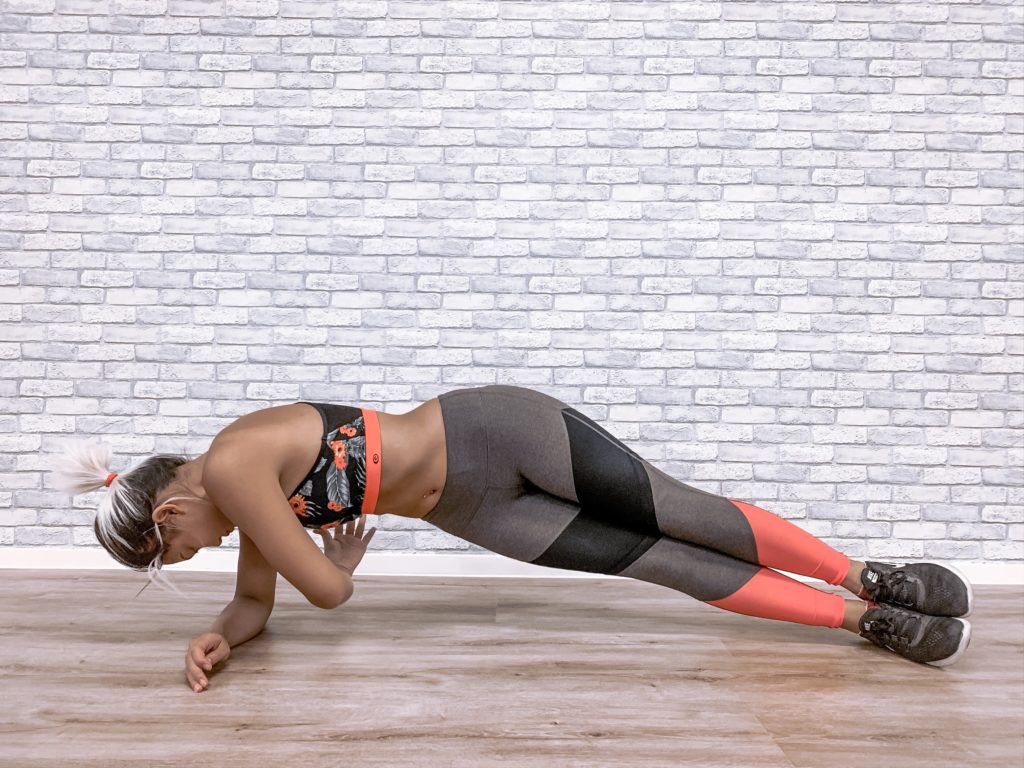
Benefits:
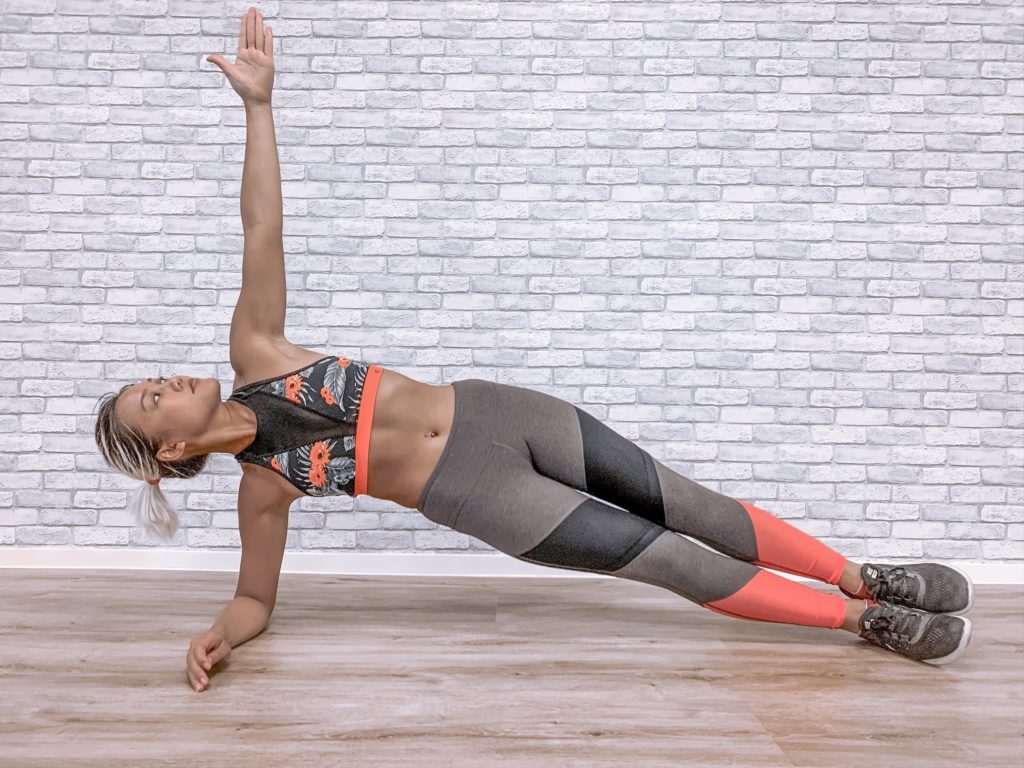
Thread The Needle requires a strong deltoid to support the body, it also a very effective way to train the obliques when you holding the side plank. Adding a twist in between can squeeze and active more with the oblique muscles.
How to:
Start with side plank position, strong arm against the floor without collapsing your shoulders. Legs are straight, keep your hips high. Twist your waist, squeeze your oblique and wrap your straight arm underneath. Maintain normal speed, about 4 seconds and try to hold for 1 second whenever you squeezing your muscles.
Points for Thread The Needle:
- Don’t let your shoulders collapsed, shoulders should be away from ears.
- Arm strongly press from the floor, relax the fingers.
- Keep squeezing the inner tights.
6. Glute Bridge Exercise – 15 reps, 3 rounds
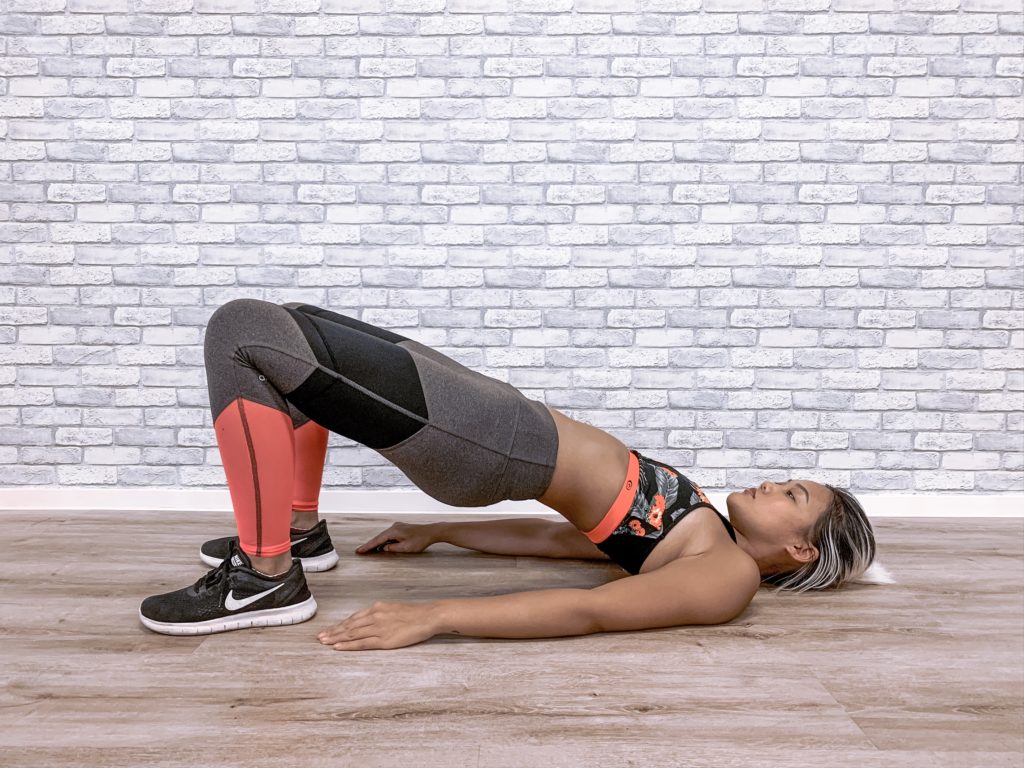
Benefits:
Glute Bride Exercise is a super powerful workout to strengthen your glutes and hips (yes, for those who love a lifted bum!), it also helps to activate your abdominal muscles! It’s targeted to build up core ability and back muscles which is a great practice for those who have lower back pain.
How to:
Lie down on the ground relax your body, bend your knees with feet flat on the ground. Lift your hips up push it with your heels and place your arms straight on the floor, palms face down. Keep the alignment of your hips, back and shoulders to avoid any back pain. Hold for 4 seconds and SLOWLY bring your chest, your back, lower back and hips down one by one.
Points for Glute Bridge Exercise:
- Use your HEELS to lift your hips NOT your back.
- Keep squeezing your GLUTES whenever you hold the bridge.
7. Flutter kicks Exercise – 20 reps, 3 rounds
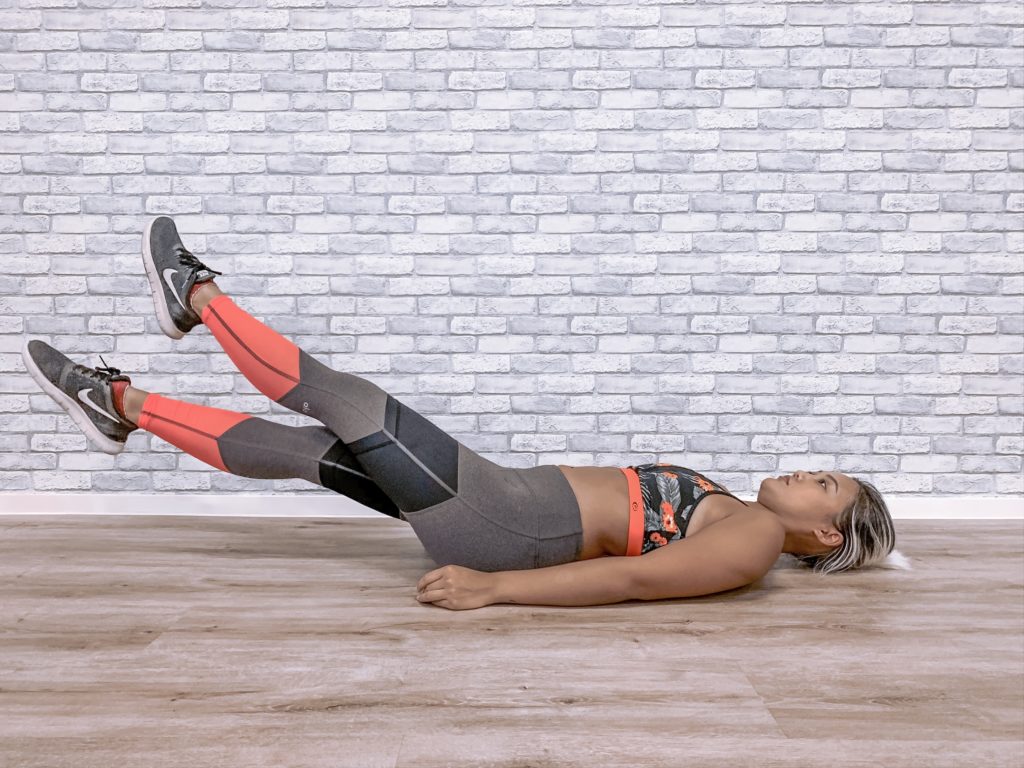
Benefits: Flutter Kicks is another X to kill those abs! It burns your obliques and giving you that waistline by kicking those legs. This exercise focuses your lower abs but your whole abdominal should also be active the whole time. The closest your legs go to the floor the harder it gets, but make sure your spine should be glued on the ground (no gaps in between)! If you have lower-back pain as I do, it’s okay to keep your legs up as long as you don’t feel anything from your back.

How to:
Hands press down on the floor, legs straight, abs tight. Press your belly button down to your spine, make sure lower-back touches the floor. Lift up your legs until you feel your abs and start scissor kicking with both legs.
Points for Flutter Kicks Exercise:
- Make sure your lower back is GLUED on the ground, if there’s a gap in between try not to low your legs to close to the floor.
- Your abs should feel tightened and squeezed ALL THE TIME.
- Your heels shouldn’t touch the ground during the exercise.
Crunch Exercise – 20 reps, 3 rounds
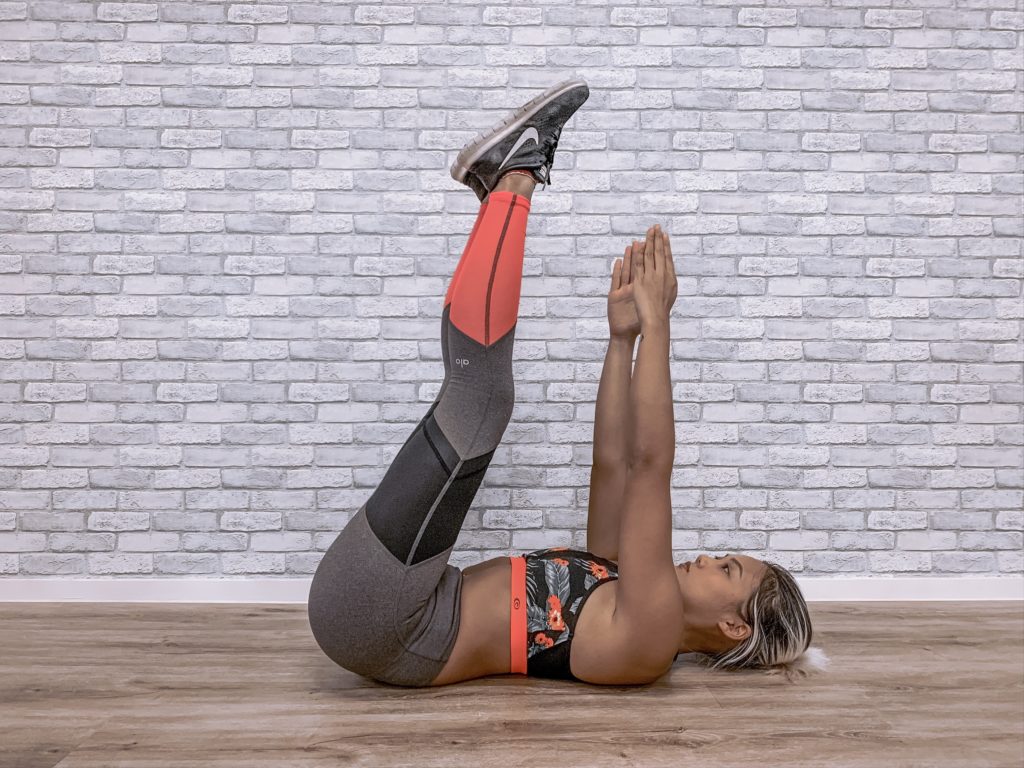
Benefits: You should feel your upper abs burning with this Crunch exercise! If you have flared rib cage problem it also helps to improve the symptoms.
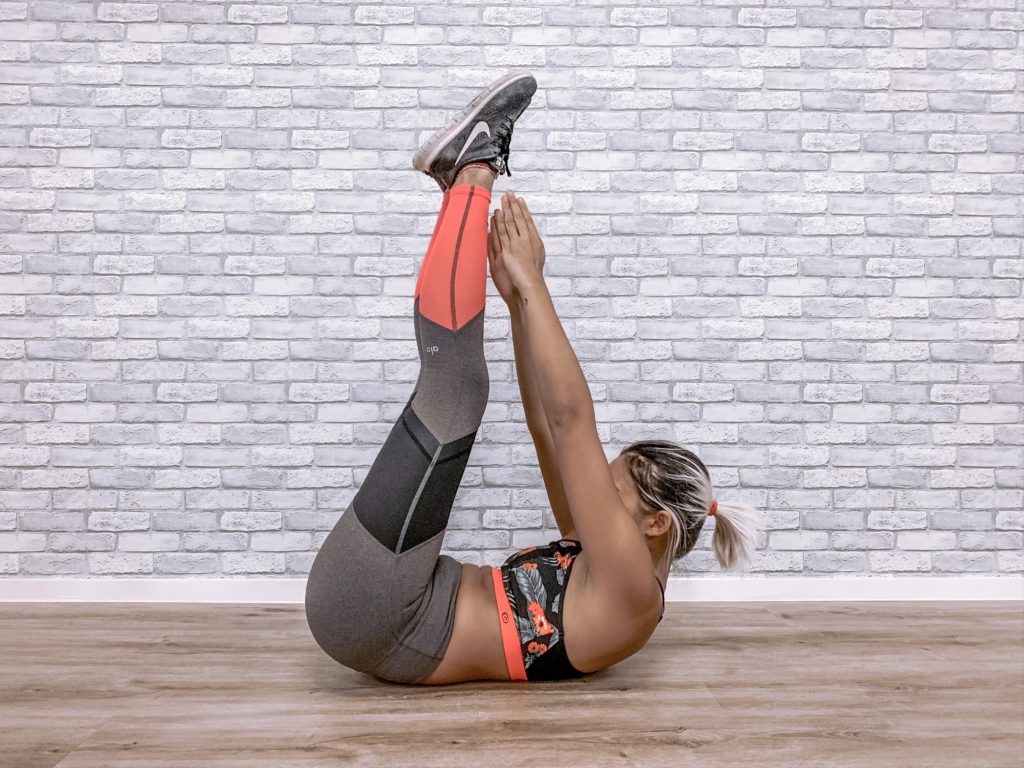
How to: Lie down on the mat, raise your arms and legs up and keep your lower back glued on the floor. Slowly roll your shoulders, chest up. Imagine you try to touch your toes with your arms straight. Make sure you use your ABS to roll you up NOT YOUR BACK, abs should feel hard and tight if you poke it with your fingers. Inhale when you roll, exhale to release.
Points for Crunch Exercise:
- No space between the floor and your lower back.
- Arms and legs should be as straight as you can.
- Make sure your neck and spine are in line.
Cat-Cow Exercise – 20 reps, 3 rounds
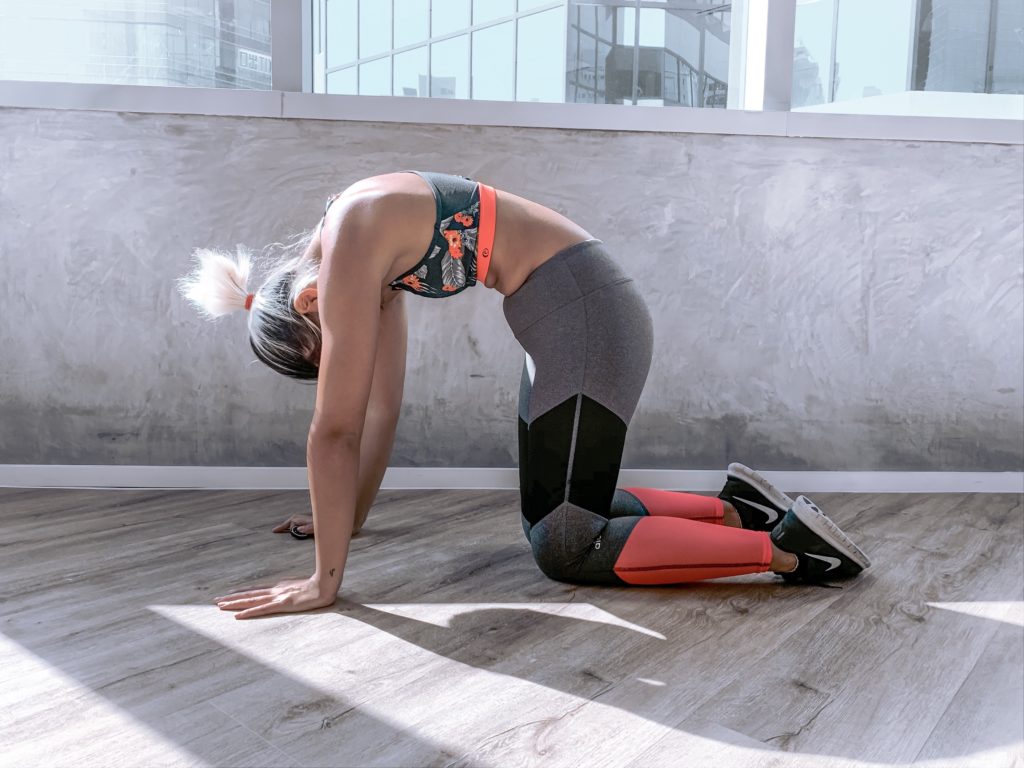
Benefits: Once you have done above exercises, it’s time to stretch!! Cat cow helps to open up your chest and release any tension off your back, it’s a great exercise for warm-up or stretching after a workout.
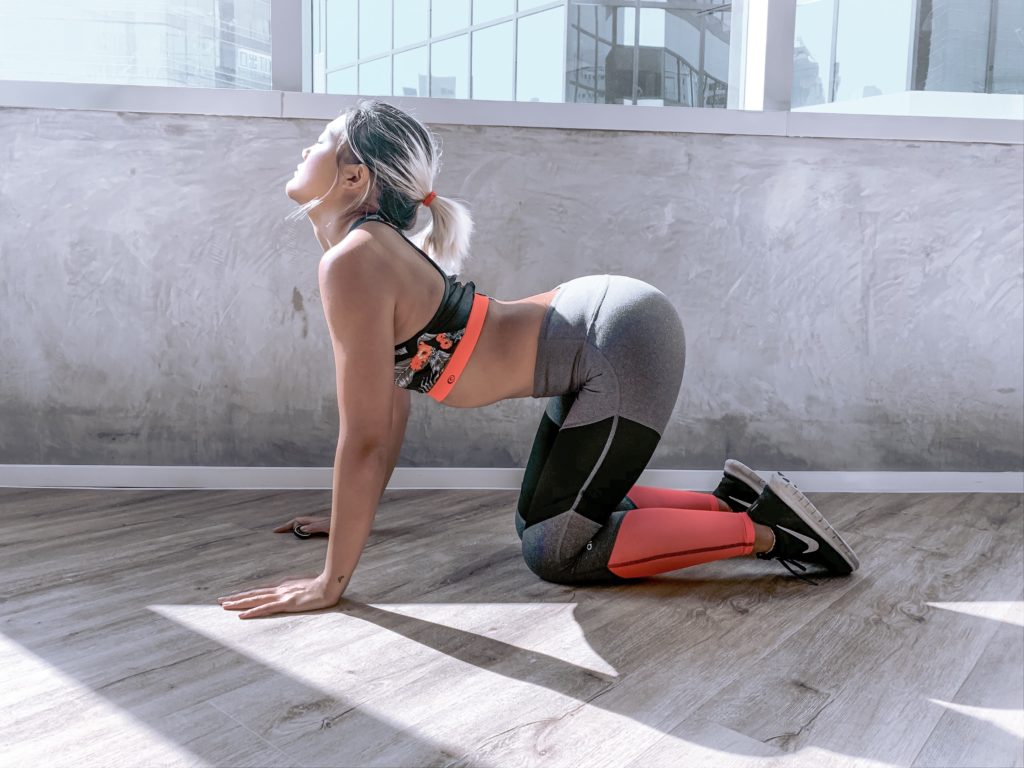
How to: Start with a tabletop position, place your wrist and knees shoulder wide on the mat. Slowly arch your back and look up when you inhale, stay for a few seconds. And slowly move your spine from arching to rounding when you exhale and stays for another few seconds. Repeat 5 to 10 times, and finish with a Child’s pose.
Points for Cat-Cow Exercise:
- Hips above knees
- Take your time and do it slowly! Relax…
Now your abs should be on FIRE! Do it 2 to 3 times a week, in no time you should be feeling leaner and more defined! Hope you enjoy this 8 Easy Abs Exercise you can do at home!
Last but not least!
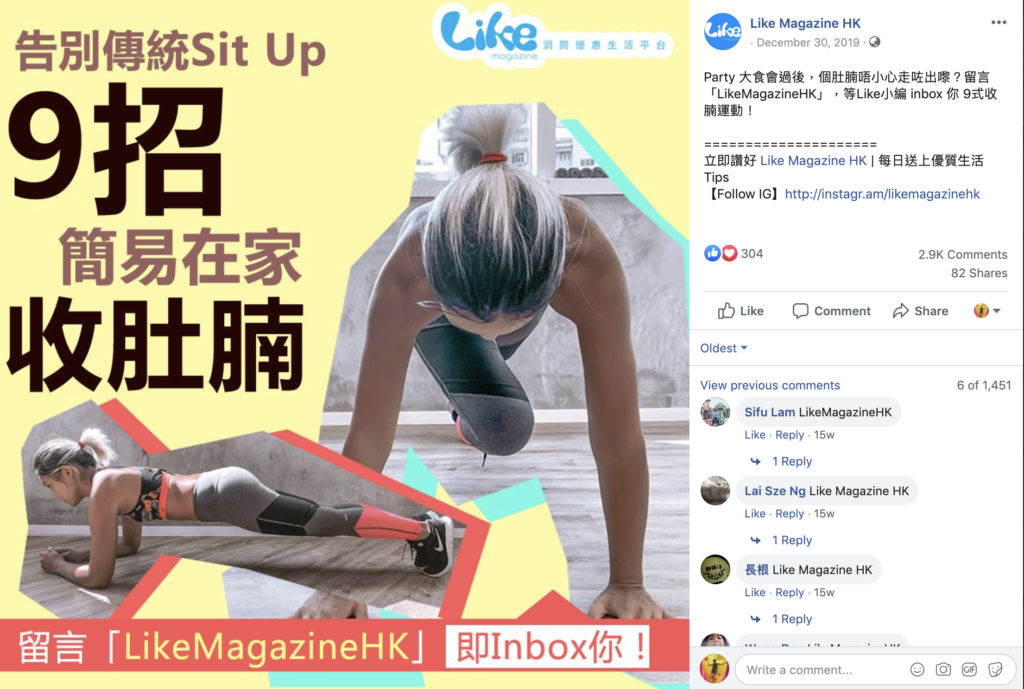
A BIG THANK YOU to Like Magazine for sharing my post (in Chinese)! If you wish to see the Chinese version, click HERE to check it out 🙂
See you soon 🙂
